Packages and Inventory
Perhaps the most key component of a registration, Packages and Inventory are the things you sell and how much you charge
Features
We have a two-tier system of packages and inventory which separate the inventory you sell for the price you charge. Consider this scenario:
- You have 100 spaces available in your event.
- You wish to have an early-bird discount of $250 and a regular price of $300
- Regardless of when people register, you can't accept more than 100 registrations.
In MotorsportReg.com, we set this up as one inventory item ("Registration Fee") with a quantity of 100 and two packages ("Early Registration - $250", "Registration - $300"). It doesn't matter if you have one or ten price points, the "thing" you're selling is a Registration for your event and there are only 100 of them available; that's your inventory item. The price you want to charge is the "how" you're selling and are your two Packages. When it comes time to run a report and see how many registrations you have, the number you care most about is how close you are to 100 and selling out.
Here it is in graphical form:

Reports turn inventory items into a cross-tab and display them as columns with quantities ordered and totals.
Adding or Editing Packages
Packages are added by clicking the wrench at the top of the Parts Bin and choosing Add New, Package. The following form will be presented in the edit pane:

The name is what is displayed on the registration form as well as in certain reports so a brief title is best. The description is displayed under the name on the registration form and may further elaborate about the package. The price is set in units of your default currency (currently USD). Remember any fees will be deducted from this price so adjust accordingly.
Once saved, the package must be dragged from the parts bin onto the form layout for a user to be able to select it. See our form builder video for a live demonstration.
Limiting Per-Registration Quantities
Most of the packages placed on registration forms are "take it or leave it", that is, the attendee can buy it or not buy it. In some cases it is required (e.g., Registration fee) and in other cases is it optional (social dinner or lunch). In other cases, you may wish to give the first one for free and charge for extras (t-shirts). All of these scenarios can be handled with the four options for Purchase Limits which control how many each attendee can buy per-registration.

- Min - the minimum number of this package that must be ordered
- Max - the maximum number of this package that can be ordered
- Default - if min and max are not the same, what number the registration form will start out with when first loaded by the attendee and may be subsequently changed by the user
- Comps/Free - the number that can be selected before the attendee is charged
Subject to nesting, grouping and branching on the form layout, the purchase limits therefore mandate:
- If minimum is non-zero, the package is effectively required.
- If minimum and maximum are the same - the user will be forced to buy that number and the default quantity will be ignored
- Packages placed in a group do not use the minimum field to require a selection - if you require the user to select one of the packages in a group, choose the required field on the Group
- If minimum and maximum are not 0 and 1 respectively, the user will be presented with a dropdown box letting them select the appropriate quantity between min and max
WARNING: A common mistake is to put the total quantity available for the entire event as the Maximum purchase limit. This controls what each attendee can purchase whereas Inventory quantities control the overall number!
Per-registration or Per-instance on the form?
There is technically a caveat here that applies to more complex registration forms. Because you can place a package from the parts bin on the form layout more than once, the attendee may be able to choose your package multiple times. If so, the selections will be combined. The purchase limits technically control each instance of the package on the form layout.
Few registration forms need to worry about this since groups and branches combined with form layout nesting make this a non-issue.
Give some for free, charge for extras
It is common to use the "first one free" for an add-on like a t-shirt or lunch ticket but charge for additional selections. The Comps/Free field is specifically for these setups. If the Comps/Free value is not zero, then the attendee will be able to select that number of the package before they are charged. Take a dinner ticket as an example where the price is $20 and they receive the first one free but can order up to four additional. We would set it up like:
- Price $20
- Minimum: 0
- Maximum: 5
- Default: 1
- Comps/Free: 1
A single Inventory item called "Dinner ticket" would be checked for this package. The registration form would look like:

It is possible for the user to say, "No thanks, I'll pass on the dinner" and remove their free ticket (which you pre-selected with the Default quantity), keep their free single ticket, or add up to four additional tickets at the price of $20 each. On the payment screen we show the calculated discount. If the user removes their free ticket, they do not earn a discount on the registration. Comps/Free will subtract the price when selected but does not credit the registration if unselected.
How purchase limits change the form fields
Depending on your settings for minimum and maximum, the form fields will change:
| Minimum | Maximum | Form Field Displayed |
|---|---|---|
| 0 | 1 | Checkbox |
| X | X | When min and max are equal, no field is displayed as user must take the fixed amount |
| < Max | > 1 | Dropdown box to select the quantity |
Adding or Editing Inventory Items
Inventory items are very simple - they are a name and a quantity. A quantity of 0 means "unlimited". Inventory items are added, edited and deleted while editing a package using the small grid at the bottom of the right pane:

Clicking any existing inventory item will permit you to change the name and the quantity. Clicking out of the field or hitting enter will set the field and the line will be marked with a red flag indicating it has been changed. Clicking the Add button will insert a new line that may be modified, also marked with a red flag. The save button at the bottom will persist your changes.
The "quantity sold" column is a helper that counts how many of each inventory item has been sold to date. If your maximum quantities are non-zero (meaning an item may sell out or waitlist), this total helps you track how close you are to the limit in case you wish to make adjustments.
Once added to the list of Inventory items, check the box at the beginning of each line to include or exclude it from the current package.
Limiting Overall Availability and Waitlisting
If an element of your event has a maximum capacity, you control this via the Inventory quantity. Just click into the quantity field for the inventory item in question and adjust the quantity by typing in the number, using the up and down arrows or your mouse scroll wheel. Click save at the bottom to finalize the update.
Waitlisting is controlled at the Package level so you can decide on a case-by-case basis whether or not something should sell out or force a registration to the waitlist. Waitlist is just a status in MotorsportReg.com and is set at the registration level. This means if someone selects a waitlisted package like "Garage Rental", it will waitlist the entire registration.
If you have inventory item limits and wish to enable waitlisting, check the box at the bottom of the package screen and click save.
When are Packages 1:1 to Inventory?
Most of the time there will be a 1:1 relationship between packages and inventory and just one inventory item checked per package. More complex events may have other arrangements. See the examples below and our event recipes to see how you can leverage this capability for your events.
Examples
These quickies will help you brainstorm various approaches to selling packages and inventory.
Early Bird Discount
Early bird discounts (or late fees or any kind of staggered pricing) are generally handled by having more than one package with the same inventory items but different prices. By setting sunrise and sunset dates on the form layout, the early bird package will disappear and the regular or late pricing will appear at midnight of the cutover date providing a seamless transition from price point A to price point B.
Sunset dates for the first price point should be set to the last calendar day of availability (e.g., March 15 at 11:59:59pm) and sunrise dates for the second price point should be set to the next calendar day (March 16 at 12:00:00am).
This approach is very flexible because the discount can vary or can be in more than just two increments such as early bird, regular and late registration fees.
Early Bird Discount #2
If your early bird discount or late penalty is a flat fee (like -$25 or $25), you can also use a standalone package plus inventory item with the appropriate discount or price on the registration form:

By setting the minimum and maximum to 1, the discount is a required item. Combine it with a sunset or sunrise date on the form layout and you have automatically assigned discounts and penalties. No more trusting the attendee to check the box for a late registration!

With a separate inventory item for the discount or penalty fee, you will be able to individually track how many were sold in the ordered inventory report.
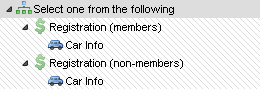
Member vs. Non-Member Pricing
Most member-based organizations must receive 85% of their income to qualify as a non-profit organization. Therefore it can be important to differentiate between member and non-member pricing (which typically includes a membership in the increased price). One way of setting this up is to use two inventory items:
- Registration - may or may not have a max quantity
- Membership - generally set to 0 for unlimited
And two packages with example pricing:
- Member Registration - $250
- Non-Member Registration - $300
Generally, the packages are placed into a mutually-exclusive group on the form layout permitting the attendee to select only one of the two choices.

The member package includes only the registration inventory item while the non-member package includes both the registration and membership items. In your ordered inventory report, each non-member registration will tally a 1 in the membership column providing an easy way to see who requires a membership to be processed.
-$1 Hidden Package for Arbitrary Discount
If a package is not placed on the form layout, then it will not appear to any of the attendees during registration. This can be used to your advantage to create hidden packages only for the use of organizers.
One common trick is to use a -$1 package tied to a "Comp" inventory item that allows the organizer to assign an arbitrary amount of discount to a registration. This can be very useful for staff or volunteer registrations who are entitled to some kind of discount. By using -$1, any dollar amount can be assigned to the registration.
There are other ways of accomplishing the same thing such as discount codes and in-system payment credits. The take away here is that packages in the parts bin may be kept off the registration form but still used by the organizer.
Accounting for Cancellation Fees
You can create a Cancellation Fee package that you apply to the registration when an attendee cancels and you refund them all but the amount of the cancellation fee. Here are the steps to do that:
- Create a new package named Cancellation Fee and input the cancellation fee amount for the price. You will also need to create an inventory item called Cancellation Fee.
- Do NOT put the package on the Form Layout. Leave it in the Parts Bin. This will allow you to access it when you go to Edit a registration, but will also keep it from being visible to the Attendee when they register.
- When an attendee cancels, go to their registration and click the link to Edit or Add packages. Enter a 1 in the quantity for the Cancellation Fee.
- Now process the refund. The $30 Cancellation Fee you applied to their registration will balance out with the $30 you withheld from their refund.
NOTE: If your cancellation fees vary, create the Cancellation fee package with a price of $1. When you edit the registration to include the fee, set the quantity (for the Cancellation Fee package) to be equal to the dollar amount of the fee. For example, you would enter a quantity of 50 for a $50 fee.
Discount Price for Combined Purchase
A very common scenario for multi-day or multi-event registration forms is a discounted rate for additional entries. For example, each day of a two-day event may cost $250 but registering for both days together entitles the attendee to a $50 discount and a total price of $450. One way of setting this up is to use two inventory items:
- Day 1
- Day 2
And three packages with example pricing:
- Day 1 Only - $250
- Day 2 Only - $250
- Day 1 and Day 2 - $450
Generally the packages are placed into a mutually-exclusive group on the form layout permitting the attendee to select only one of the three choices.
The single-day packages only check the box for the single-day inventory items respectively while the two-day package checks both inventory items. When someone registers for the two-day option, the ordered inventory report will show a 1 in each of the columns for Day 1 and Day 2 generating the proper tally.
It is very important to use this approach if you have a limited number of slots for each day. In the event that your limit was 50 for each day, this approach will ensure that once either day sells out that the two-day option also sells out or accepts a waitlist.
T-Shirt
If you are including one t-shirt with every registration and the attendee may not select additional shirts, you might use an event question to capture the size required instead of a package. Since every attendee will have a shirt, you know how many you need from your attendee count. All you need is a count of each size which a custom question using a fixed answer list (of say, "Medium,Large, Extra Large") would give you when tallied in Excel.
The advantage of this approach is that it keeps the registration form very simple with a minimum number of fields.
Multiple T-Shirts
If you want to allow the attendee to order multiple shirts in multiple sizes, you may consider setting up the registration form like this:

Here we have one inventory item per size and one package per inventory item. Each package has the minimum purchase limit set to 0 (making it optional) and the maximum set to some number like 5 (allowing the purchase of up to 5 shirts of each size).
The ordered inventory report will have one column per shirt size with the quantity selected by the attendee (from 0-5) and a subtotal for each shirt size at the bottom. The only (small) disadvantage to this approach is the presence of additional fields on the registration form.
Waitlisting Everyone
It may be useful to waitlist all registrants in order to select who will be admitted to the event. The easiest approach is to set the quantity available on the registration inventory item to be 1 and then register one person by hand as the admin selecting the package that contains the limited inventory item.
With the quantity sold now set to 1, all subsequent registrations will be waitlisted.